I designed another weird keyboard: tamago60
The original egg58 prototype used Choc V2 switches, which have MX-style stems and therefore support a wide selection of keycaps. However, it turned out that DSA, the shortest keycap profile widely available, would still bottom out if the switches were plate-mounted. The egg58 layout was not really conducive to PCB mounting, so I switched to original Choc switches.
This left me with a supply of Choc V2 switches and DSA caps which have gone unused for over a year now. I thought the egg58 was my endgame. It probably still is, but nonetheless I have made another keyboard. Just to put those spare parts to use.
I decided early on to go with an ortholinear layout, approximately 60% but arranged similarly to the egg58. At some point, I started considering adding a trackpoint to the board, like what they have on ThinkPads. It turned out that the availability of trackpoint modules isn’t too great, and there’s difficult to integrate, so I settled for a small joystick instead.
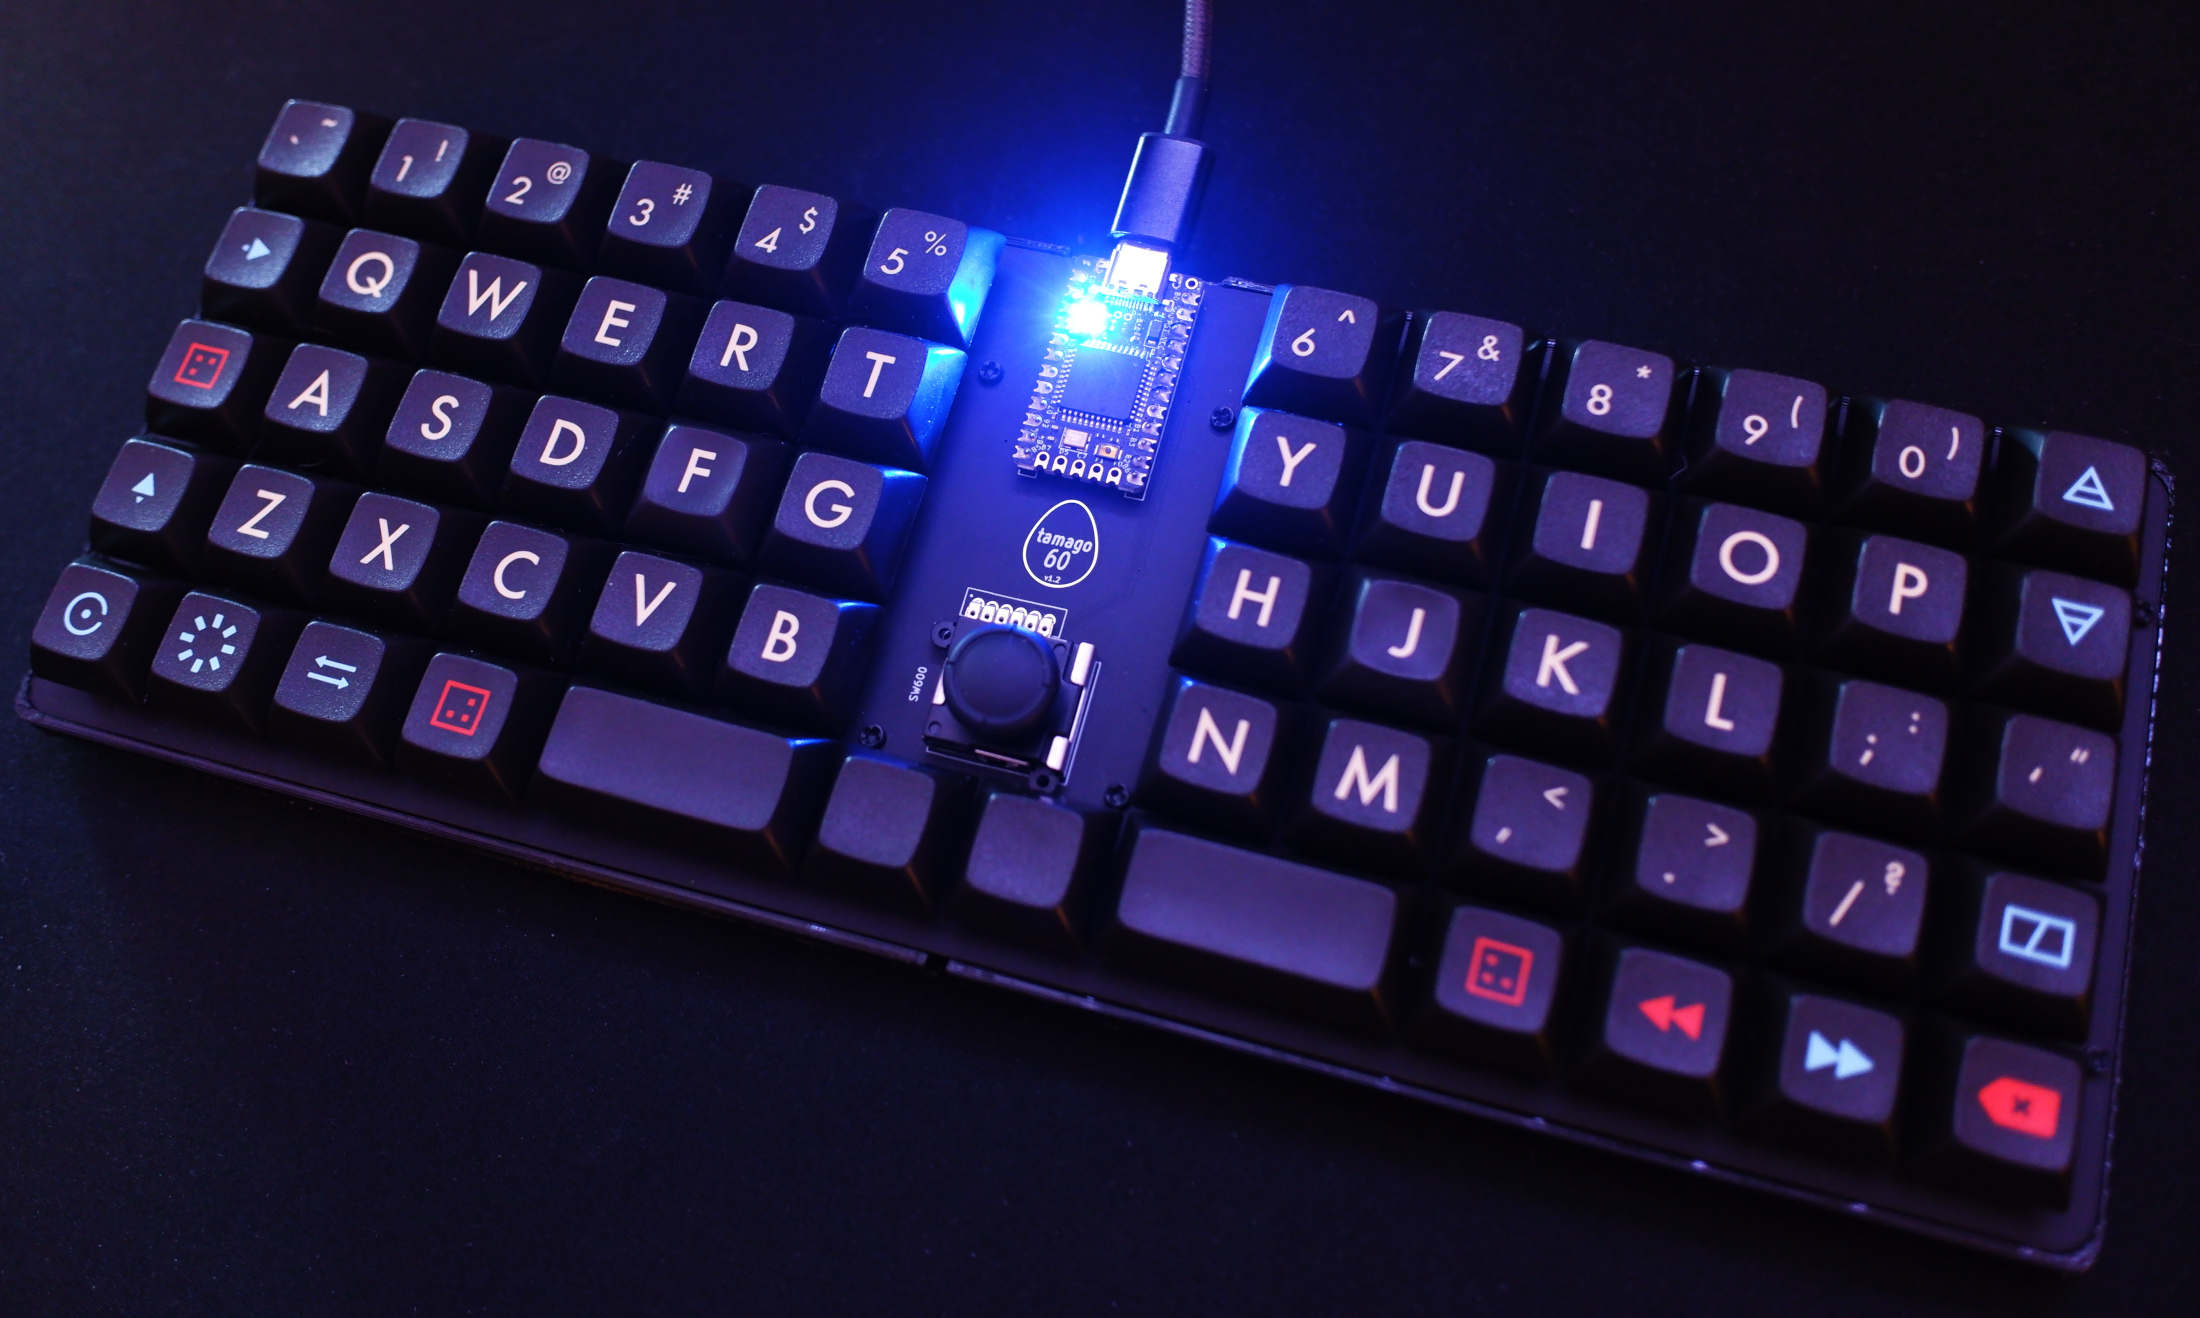
I stuck the joystick right in the middle of the keyboard, added two additional keys for left and right click, and landed on a semi-split design.
After a few hours in KiCad, I ended up with this.
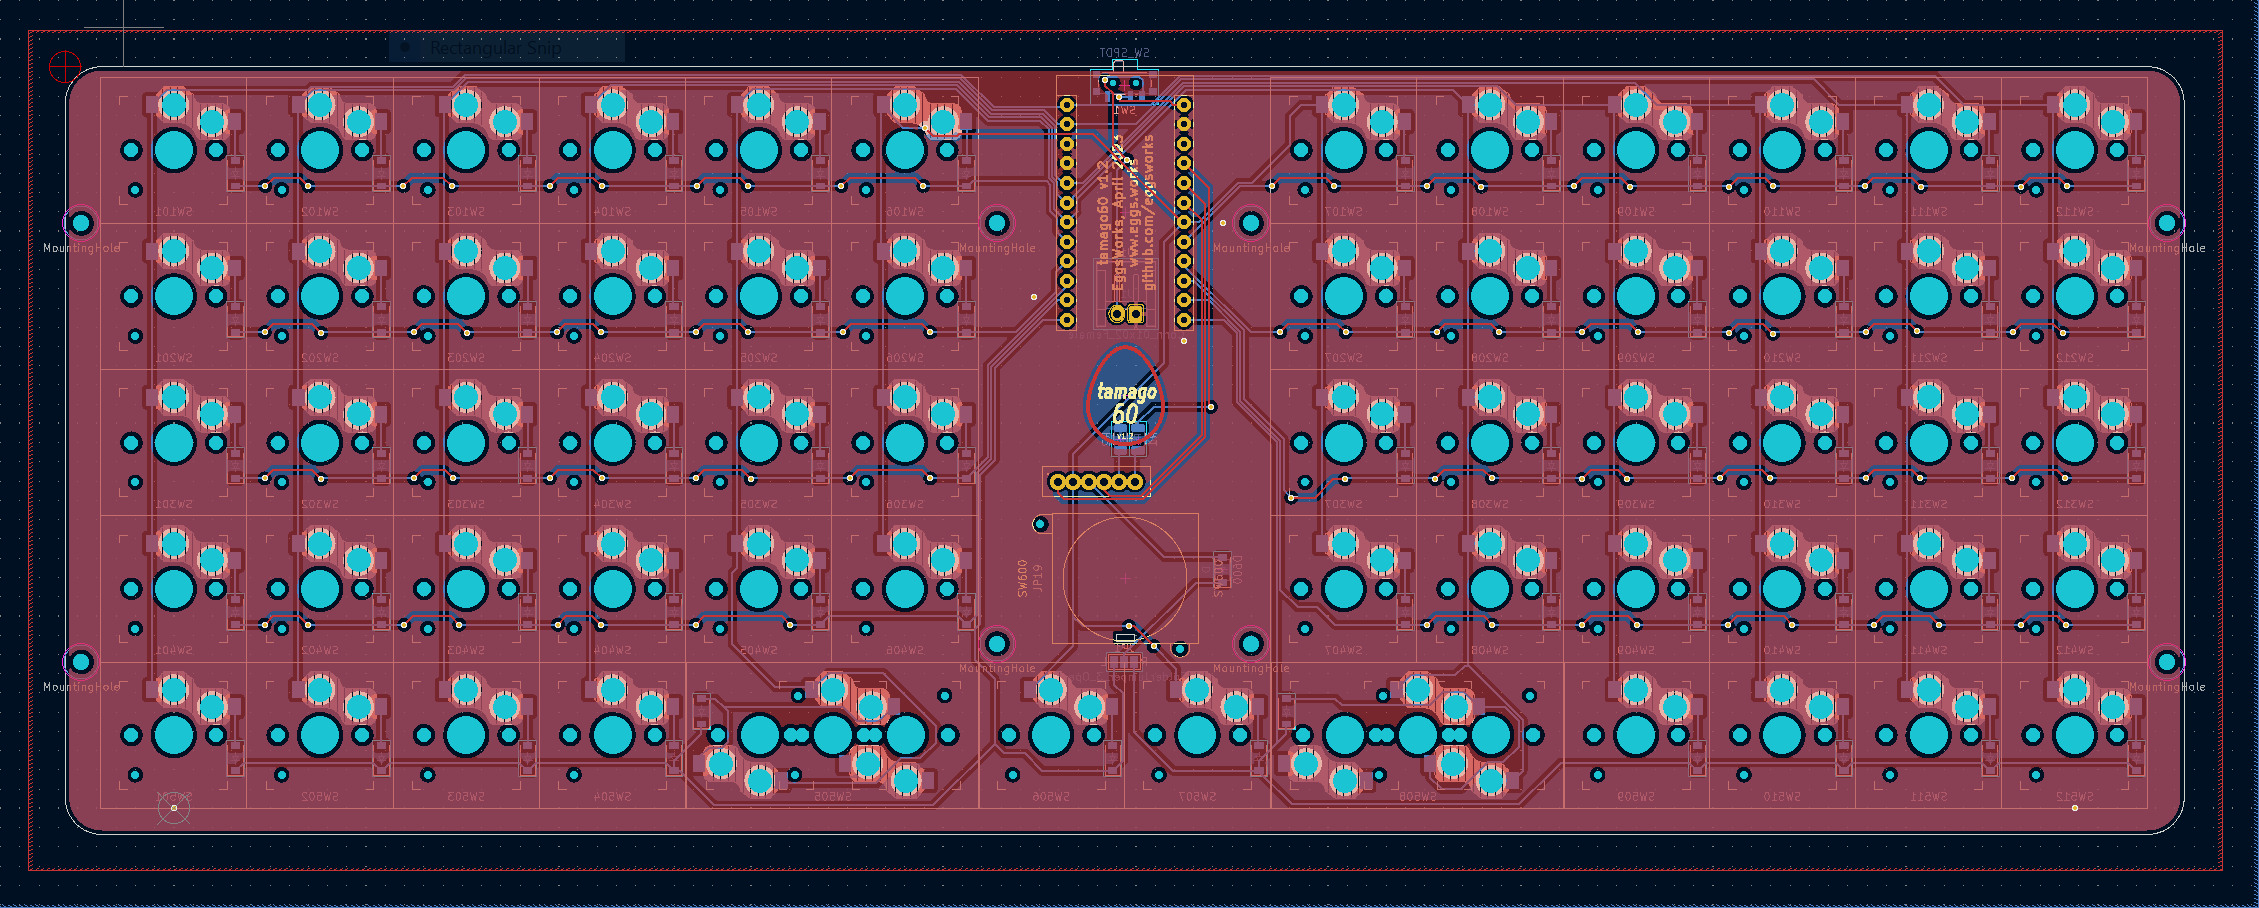
The only difficult part was figuring out a solution for the 2u positions. As you can see here, there are three switch positions for the 2u keys. I found that some of my 2u keycaps had the stem in the middle, while others had two stems placed 1u apart. Therefore, I needed the provide the option to populate switches to support either.
I wanted to target using a Pro Micro for the MCU, since I had a bunch of spares of those lying around too. It turns out that it has just enough pins to support a 10x6 matrix and two ADC channels for the joystick. There is no wasted I/O on this board.
The next step was to order the prototypes. PCBWay kindly reached out to sponsor PCB prototyping for this project. Their ordering process was straightforward, with a lot of options available. Notably, they offer a matte black solder mask, which was not available from my previous PCB supplier. Having seen it on other peoples’ projects, I knew it would look great for this keyboard.
Unfortunately, right after submitting my order, I noticed some errors in the design. I missed copying some of the mounting holes when altering the footprint for those weird 2u positions. Fortunately, once I fixed it, their support team was able to quickly replace the Gerber files before the boards went to production.
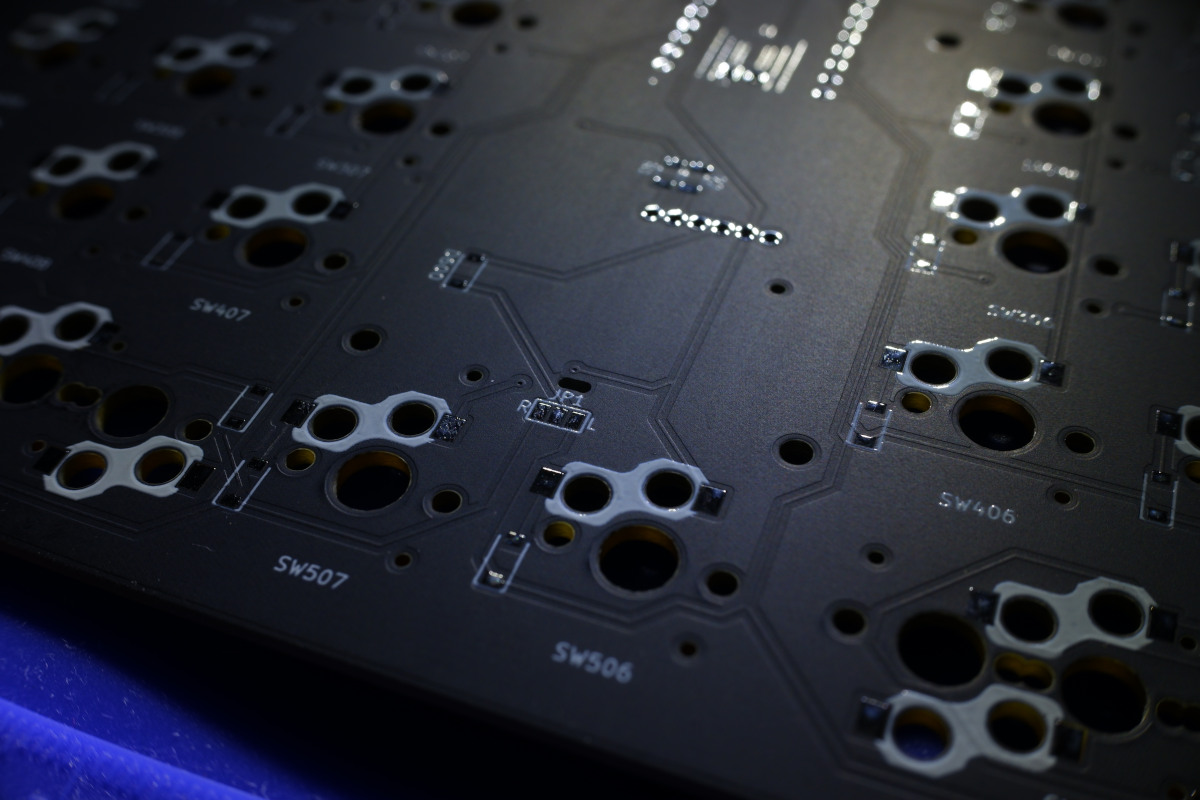
It only took a week for the boards to arrive. The matte black finish looks great, and there is a noticible improvement in the quality of details compared to the PCB producer I used previously. The cuts are smoother than I’m used to, and the silkscreen resolution seems higher.
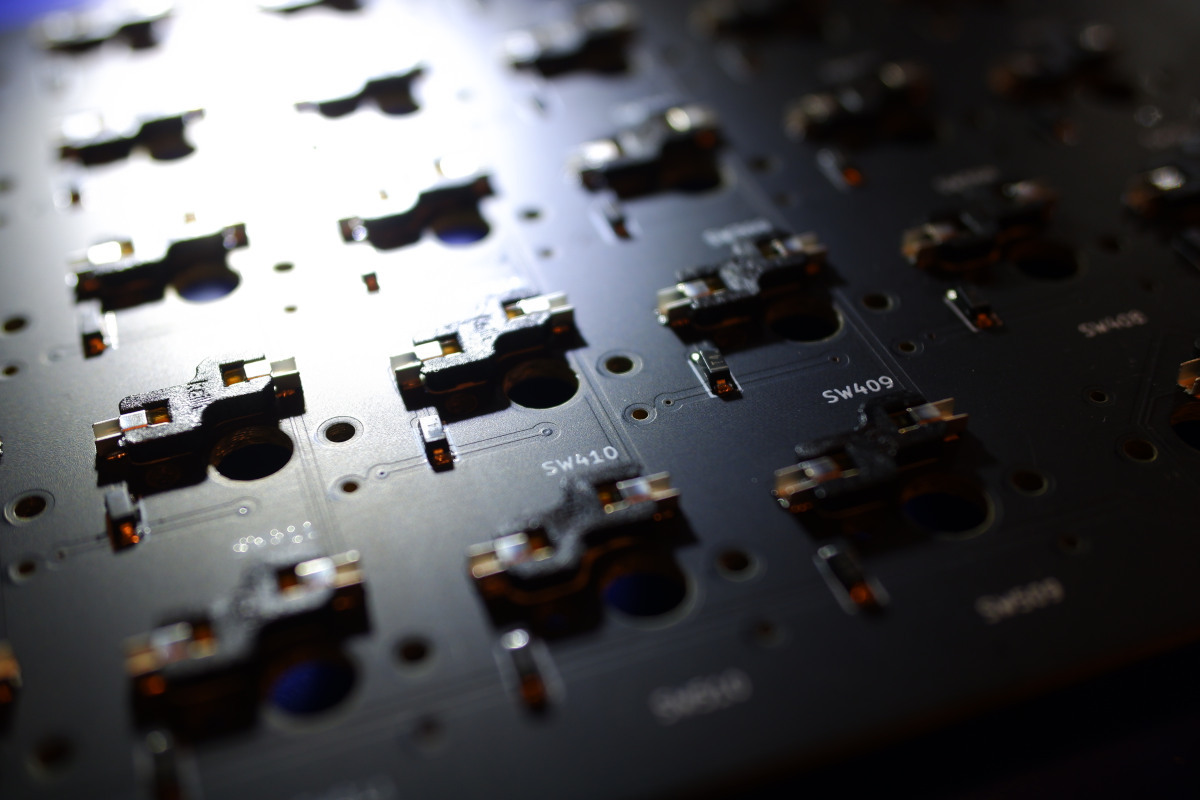
I also got an SMT stencil from PCBWay, which made it incredibly easy to assemble the board.
After adding switches, keycaps, and a 3D printed case, the tamago60 is complete.
Of course, the design is open source. I’ve also shared the project on PCBWay so you can easily order your own board: